Thursday, October 15, 2020

 Butterfly Bracelet- Part 5


Remove the tape from one side. 
Slide a finger down between the  wires as it will give a much better, sharper bend than just pulling it over.


 All the wires need to be splayed out.


Slide the first of the beads onto  the outside wire. Holding it firmly in place against the wraps, bend straight up fixing it in place.


 It needs to go behind the other wires, past the centre wire.


Tuesday, October 13, 2020

 Butterfly Bracelet - Part 4.


Making the middle wrap. 


Taking the end of one of the wrapped wires bend straight down.


 Like this.


It will create a hook that looks like  an umbrella handle.


The point should be slightly to the left to accommodate the next wire we’ll bend up.


 The hook needs to be hung over our bundle of wires about 2mm to the left of the centre line we marked.


Holding the wires firmly with the  plastic nosed pliers fold up the wrapping wire. Try not to do it all in one go. Use 3 or 4 presses on the wire instead as it gives more control and a sharper bend, then give a firm squeeze.


The secret to neat wraps is to overlap the wire slightly to the left so that it lays a little on top of the previous wire. As you squeeze it with the pliers it will ‘click’ into place. If it doesn’t it’s gone too far and needs a jiggle to get it into  place.


 Gripping and supporting the wires again with the pliers, begin to push the wire over, down and to the left with a finger. 


Use a couple of pushes to get it over and aligned before squeezing and clicking it into place. Give it a good squeeze with the plastic pliers.


Repeat until you have 5 complete  wraps to the front.


Prise up both ends and round off or file them to take off any sharp edges.


 Take the last 2mm of each end with flat nosed pliers and bend them inwards slightly.


This will encourage them to bed into the wires of the bracelet and ensure there’s nothing to rub the wrist when they are pressed back into place.


Monday, October 12, 2020

 Butterfly Bracelet- Part 3


Materials required.


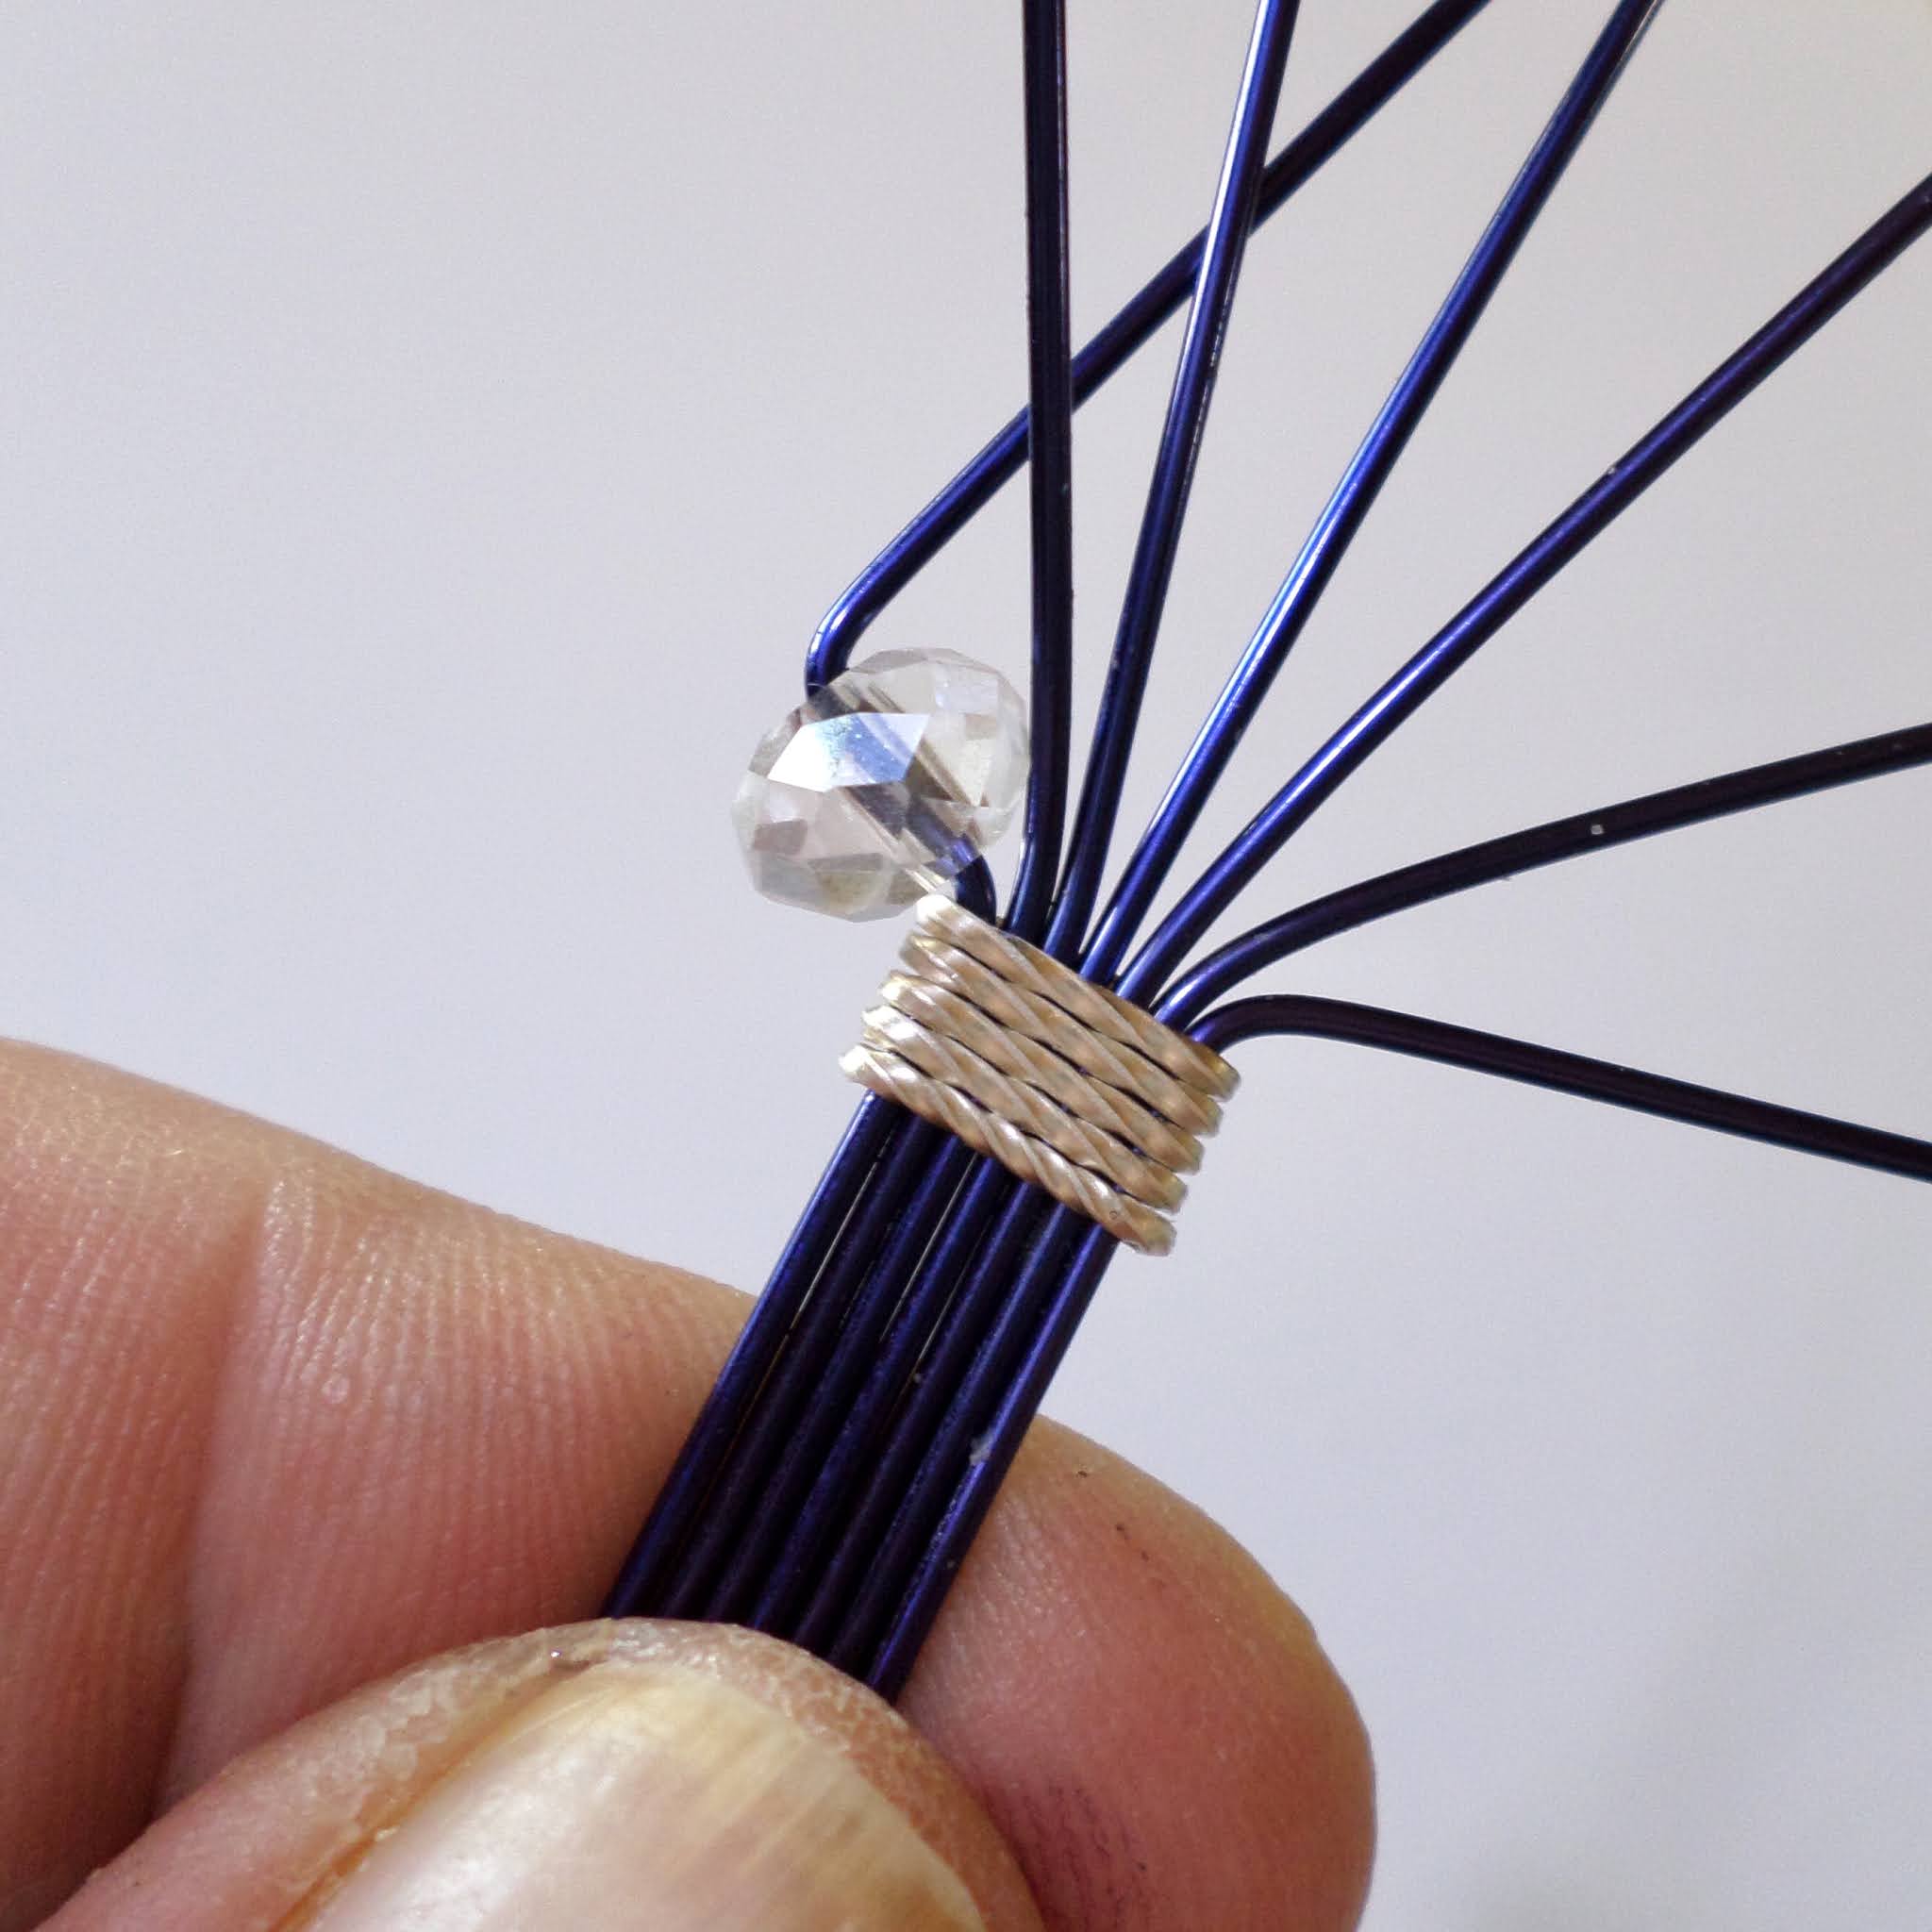
1mm (18g) round wire.


0.8mm (20g) square wire, twisted.


14 beads.

(In this example I have used 8mm crystal rondelles but rounds or bicones work as well. The best sizes to use are either 6mm or 8mm.


Preparations.


Cut 7 pieces of the 1mm round wire each 9” long.

(This is for a 7” bracelet. If you are making other sizes allow extra wire.)


Cut 5 pieces of the 0.8mm square wire each 12cm long.


Cut 2 pieces of masking tape about 5cm long.


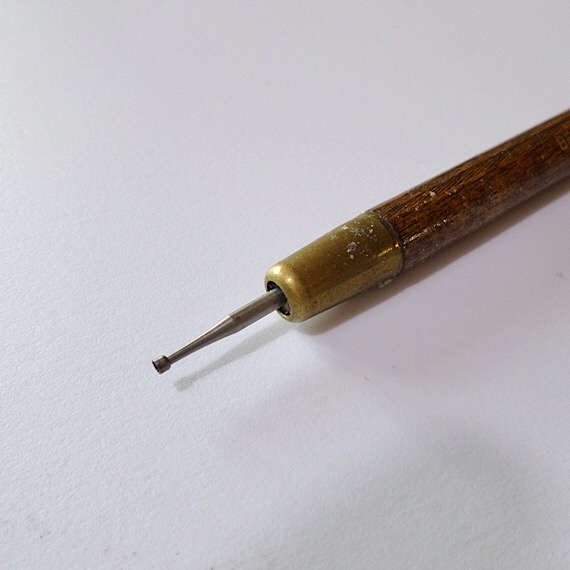
Before I use the square wire for wrapping it must be twisted.


For twisting square wires I like to  use 2 pin vices. I attach one to each end of the wire and holding the left hand vice firmly I roll the right hand vice on my work surface. It’s important to keep tension on the wire as you roll it to keep the twists even along the length.


Count each roll until you are satisfied with the size of the twists so that you can repeat it with the other wires.


 Tape all 7 of the wires together in two places and mark the Centre. 


In this example it will be 4.5”.


Sunday, October 11, 2020

 Butterfly Bracelet - Part 2

This is quite an easy make but I suggest you read through the entire tutorial several times before you pick up a tool or cut a wire. Get a good overview of the steps required. I have used contrasting colour wires so that wraps etc are easier to see. Purple wire and clear A B rondelles.


 I like to use a wire straightener on all my wires to take out any kinks etc.


You can use plastic jawed pliers, a cloth or even your fingers to achieve similar results but the straightener is best if you have one.


 After every final cut I always round my wires. They can be filed to achieve the same effect which is to remove any sharp edges left by the cutters. No one wants to wear anything uncomfortable or catches in their clothes.


As I do a lot of it I have a battery operated version which is very

 quick and takes all the effort out of it.


This is a manual version of the  wire rounder. A cup burr on a handle that you have to twist on the end of the wire. It can be hard on the hands and for a little more the battery version is a better choice.


 Butterfly Bracelet - Part 1.


                                                         Tools I used in this project. 


Small and large flat nosed pliers.


Plastic jawed flat nosed pliers.


Plastic hammer.


Flush cutters.


Bail maker pliers.


Pin vices


Wire straightener


Ruler in imperial and metric.


Bracelet mandrel.


Permanent Marker pen.


Masking tape.