Final Wire Wrapping The Bail
On my last post of this series this is where we left the pendant with the bail completed but unadorned. Now we get to the fun part! This is the very best bit for me as I get to express myself trying to make different bends each time. This is where we can create visual interest and show our own style. The world and his brother makes jewellery and we want to be different to them.
Placing my thumb below and finger above I pull outwards on the wires which will cause them to warm and soften as well as putting a gentle bend into them. Doing this a few times will allow you to increase the curve and soften the wires even more which will help in forming them.
Continuing to hold the wires as before I rub the wires with my thumb and place gentle downwards pressure with my finger where I will be making the bend. This softening will allow you to create a nice, gentle curve.
Gripping the end of the wires between thumb and finger I will gently pull the wires down and to the right until they are roughly in the position I want them.
I like to separate my wires to make them more interesting. I will keep them together for some designs but doing it this way makes it look more complex and interesting. It drives my Son crazy trying to work out how I have bent my wires on finished pieces!
Gripping the wires in the 'elbow' of the bend and pressing them together will start them separating. taking the ends of the wires I will gently pull them until they are equal and uniform and most pleasing to the eye.
The wires can now be trimmed to their final size. The endless variations are where the fun lies for me. The way they are bent and how long I leave them in relation to one another. This is a very simple wrap so it's easy to follow but you can make it as twisty and complicated as you like.
Where the wires have been cut can be a bit sharp and the last thing we want is sharp edges to catch on someones clothes. They can be filed, rounded with a cup burr or as I like curled. When curling the wires back against themselves it does away with any sharp edges and adds more interest.
I prefer to use my bail making pliers for uniformity in my bends but they can easily be done with round nose pliers too. Gripping the end of the wire I curl it back in one movement.
It should look like this.
This is repeated with the other 2 wires so that they look something like this. You can now see why I trimmed them this way.
The right hand wires can be warmed and bent similarly to the left hand wires only this time I have taken them further upwards.
The wires have been separated again in the same way as before.
I have trimmed the wires to their final length. They are different to the left hand side but I like asymmetry. You can bend and cut them any way it looks better to you.
The wires are now bent back on themselves.

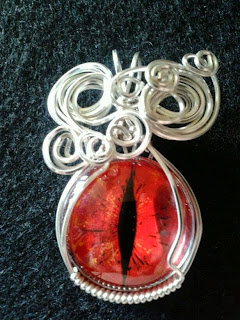
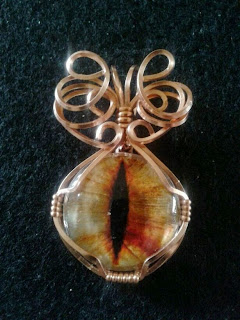
When they have all been curled the piece is just about finished. By now I hope that I have created something pleasing to the eye. I always try to create pieces that are simple and elegant. I don't like to hide the stones beauty with a 'busy' wrap and try to compliment the stone. I will have tweaked the wires just to make them a little more as I want them and then the wrap is finished all bar the polishing.
As I have gone along and my style has improved I make more complex and hopefully beautiful designs.


